
Help us even more by making “ready to assemble” paper for the Lanterns!
If you are able to make “ready to assemble” lantern paper on your own, you will be helping us save time in assembling lanterns for the live lantern launch. The instructions for using either letter or legal sized paper are below.
If you don’t have the needed materials for “ready to assemble”, you can still send us sheets of normal size paper and we will do the rest!
You will need a ruler and either glue, staples or tape.
*The end goal is to have a standing paper with 4 sides that are 6.5 inches wide and the total length of the paper should be 26 inches if you added up the sides.
If you have 8.5 x 11 inch size paper (Letter), follow these instructions:
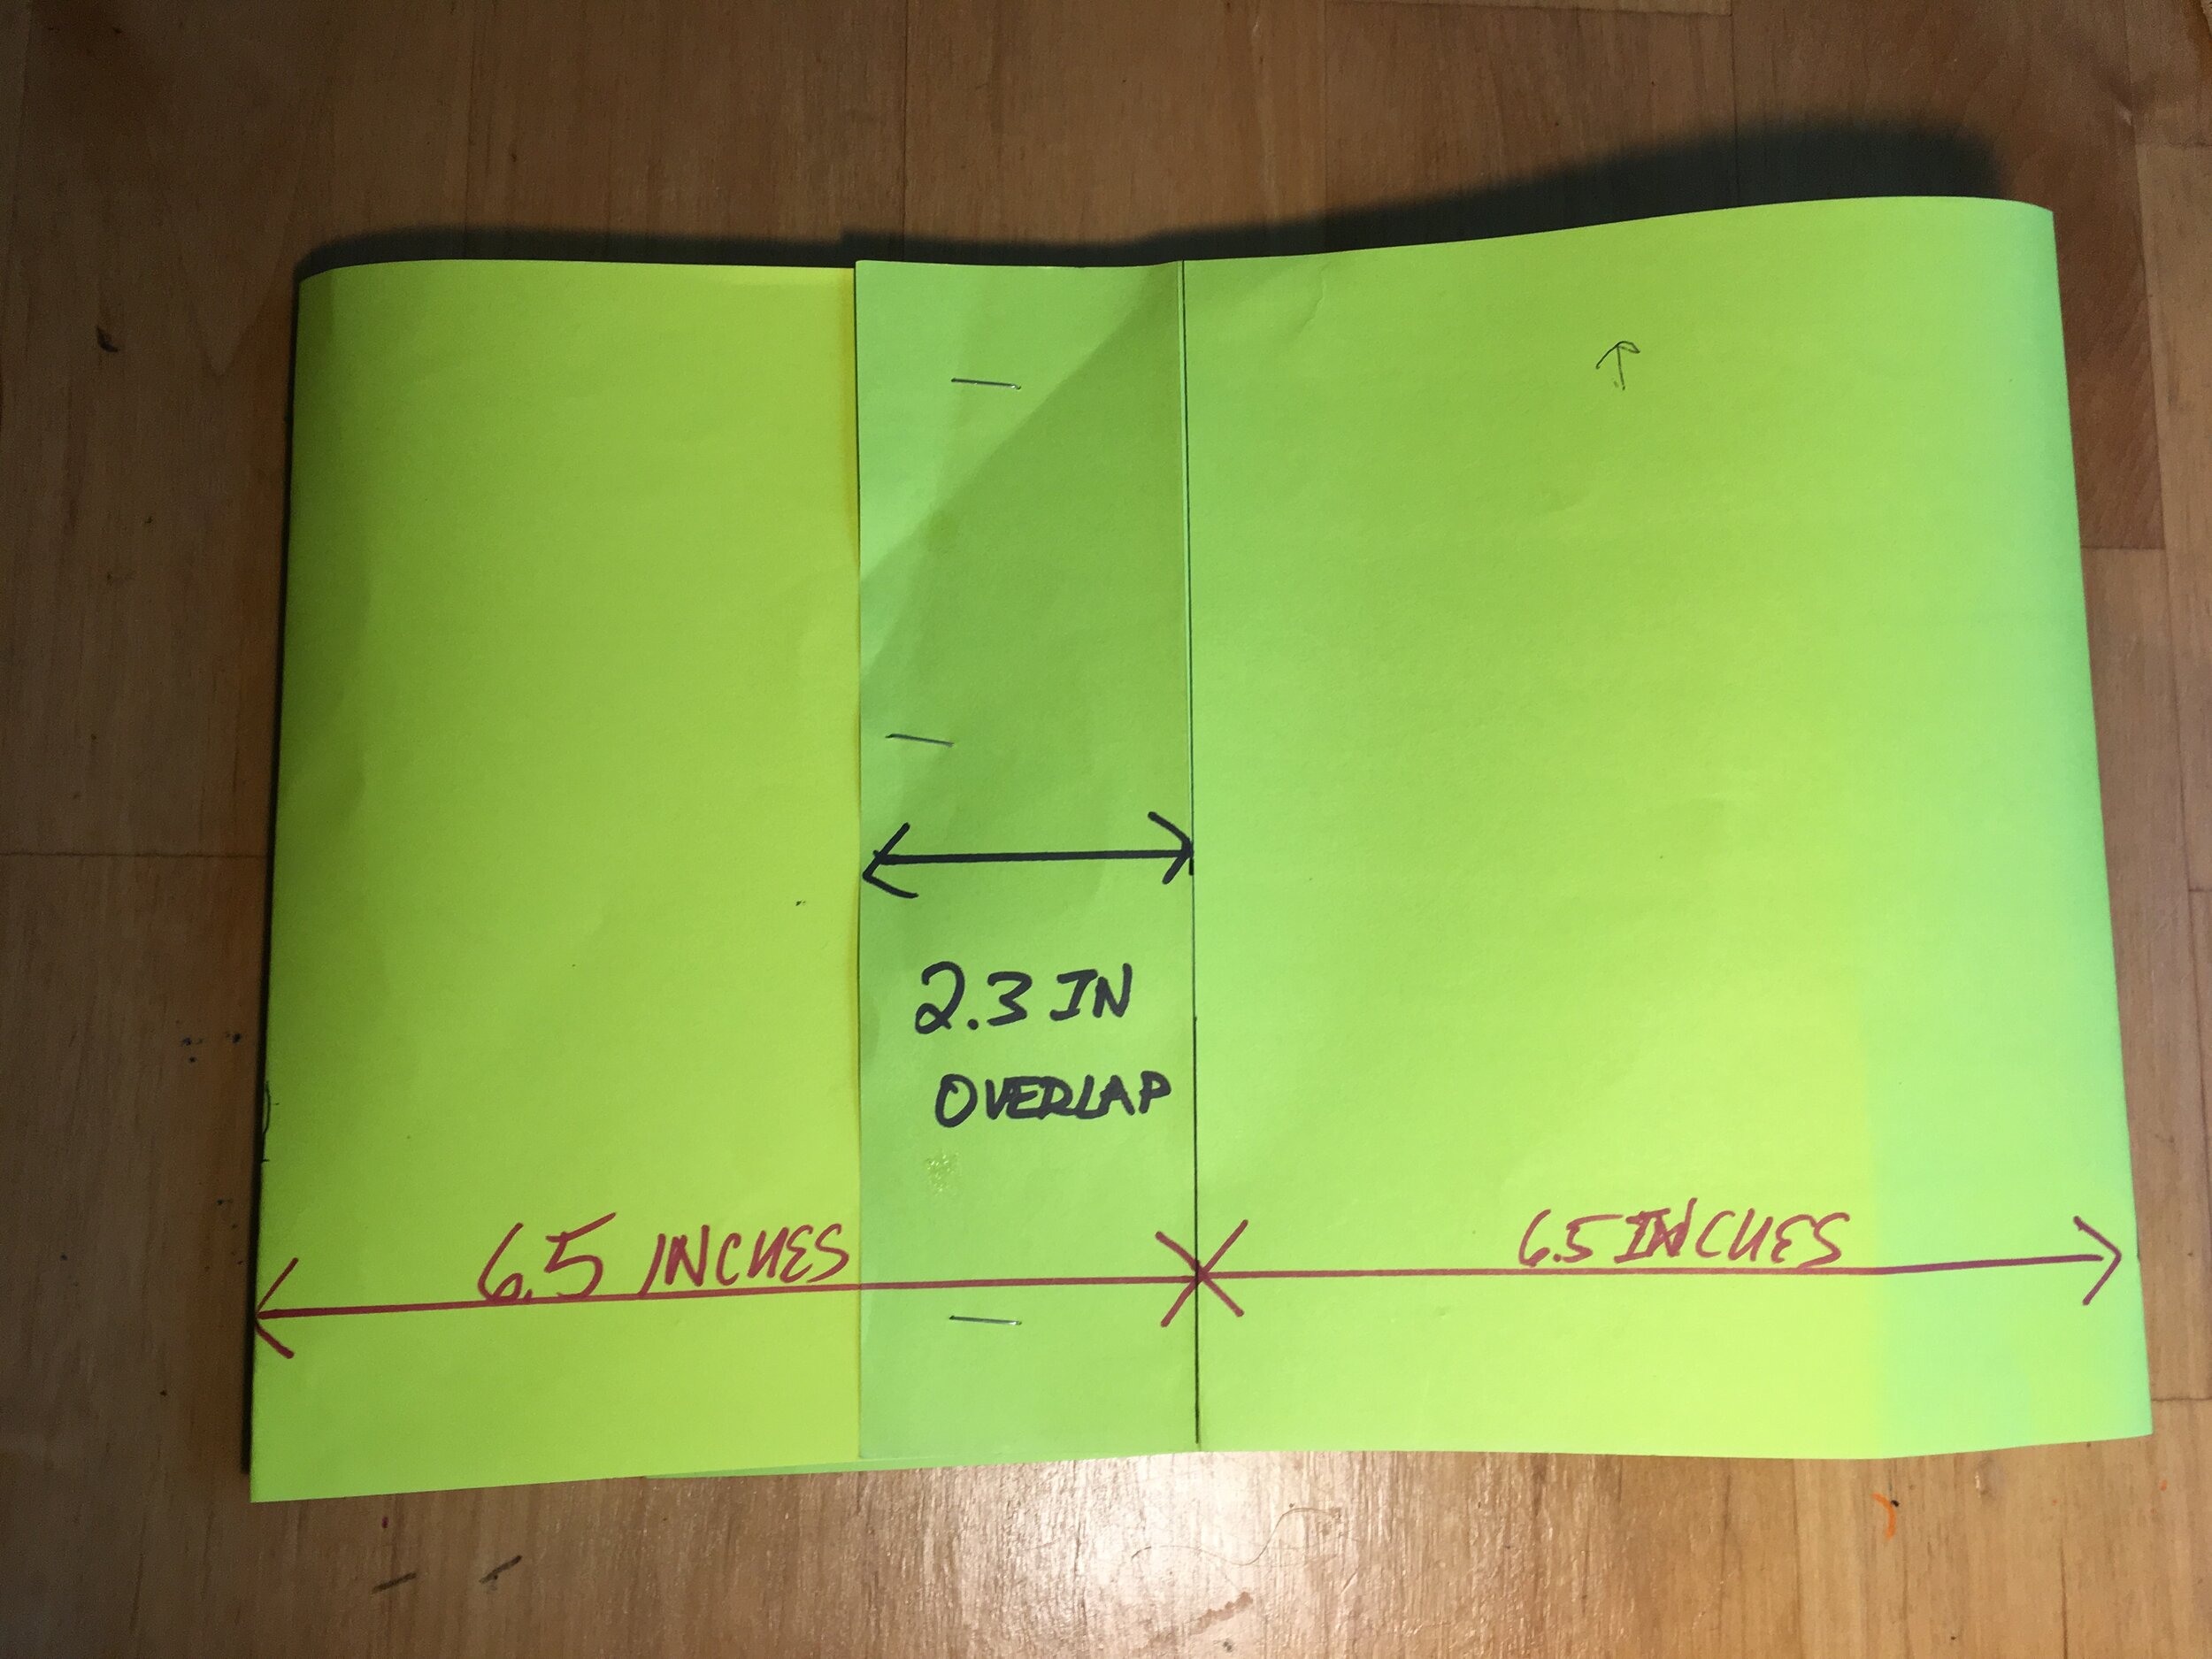
1. Use glue, staples or tape to join the 3 pieces of paper together so that there is a 2 1/4 to 2 1/3 inch overlap at each junction of the papers on the side that is 8.5 inches wide. The paper should be laid horizontally in a landscape position.

2. Mark off four 6 1/2 inch segments. Fold the paper at each 6 1/2 inch mark. The 6 1/2 inch segments are the each side of the cube for the lantern when it stands up (see next image for visualization).
3. After folding on 6 1/2 inch segment marks and you have a completed lantern to decorate.

If you have 8.5 inch x 14 inch paper (Legal), follow these instructions:
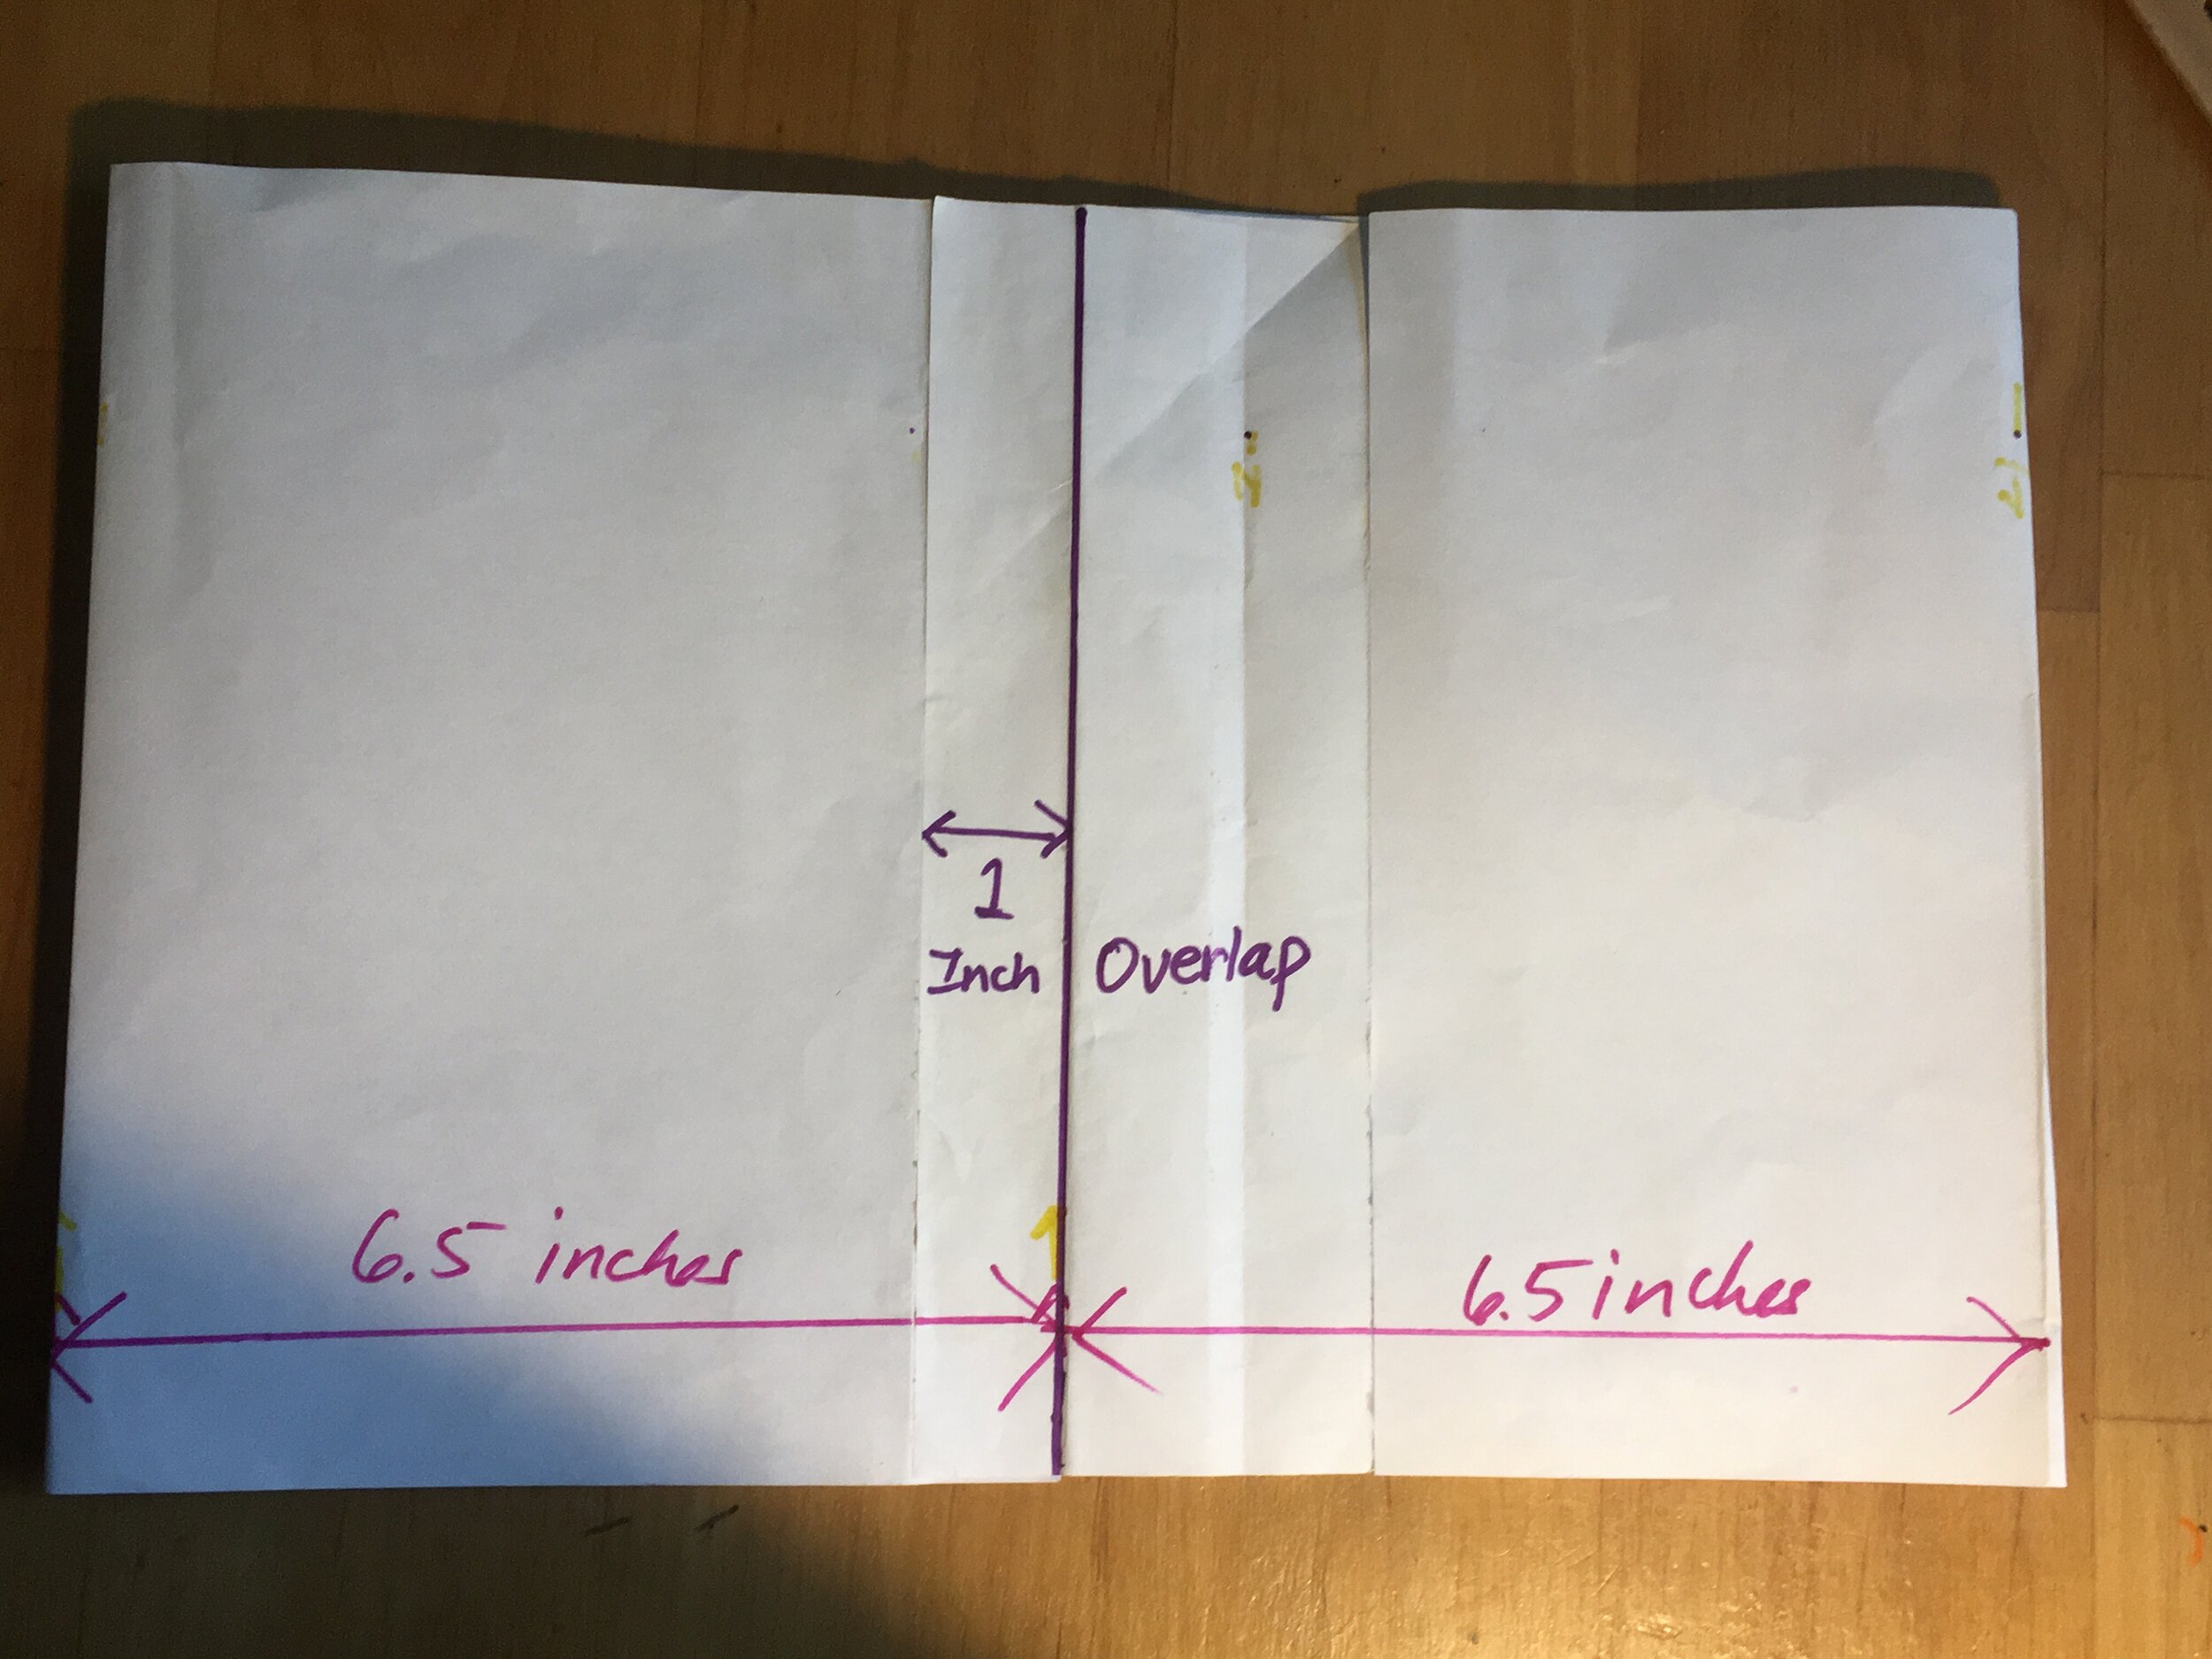
1. Use glue, staples or tape to join the 2 pieces of paper together so that there is a 1 inch overlap at each junction on the side of the paper that is 8 1/2 inches long. The paper should be laid horizontally in a landscape position.
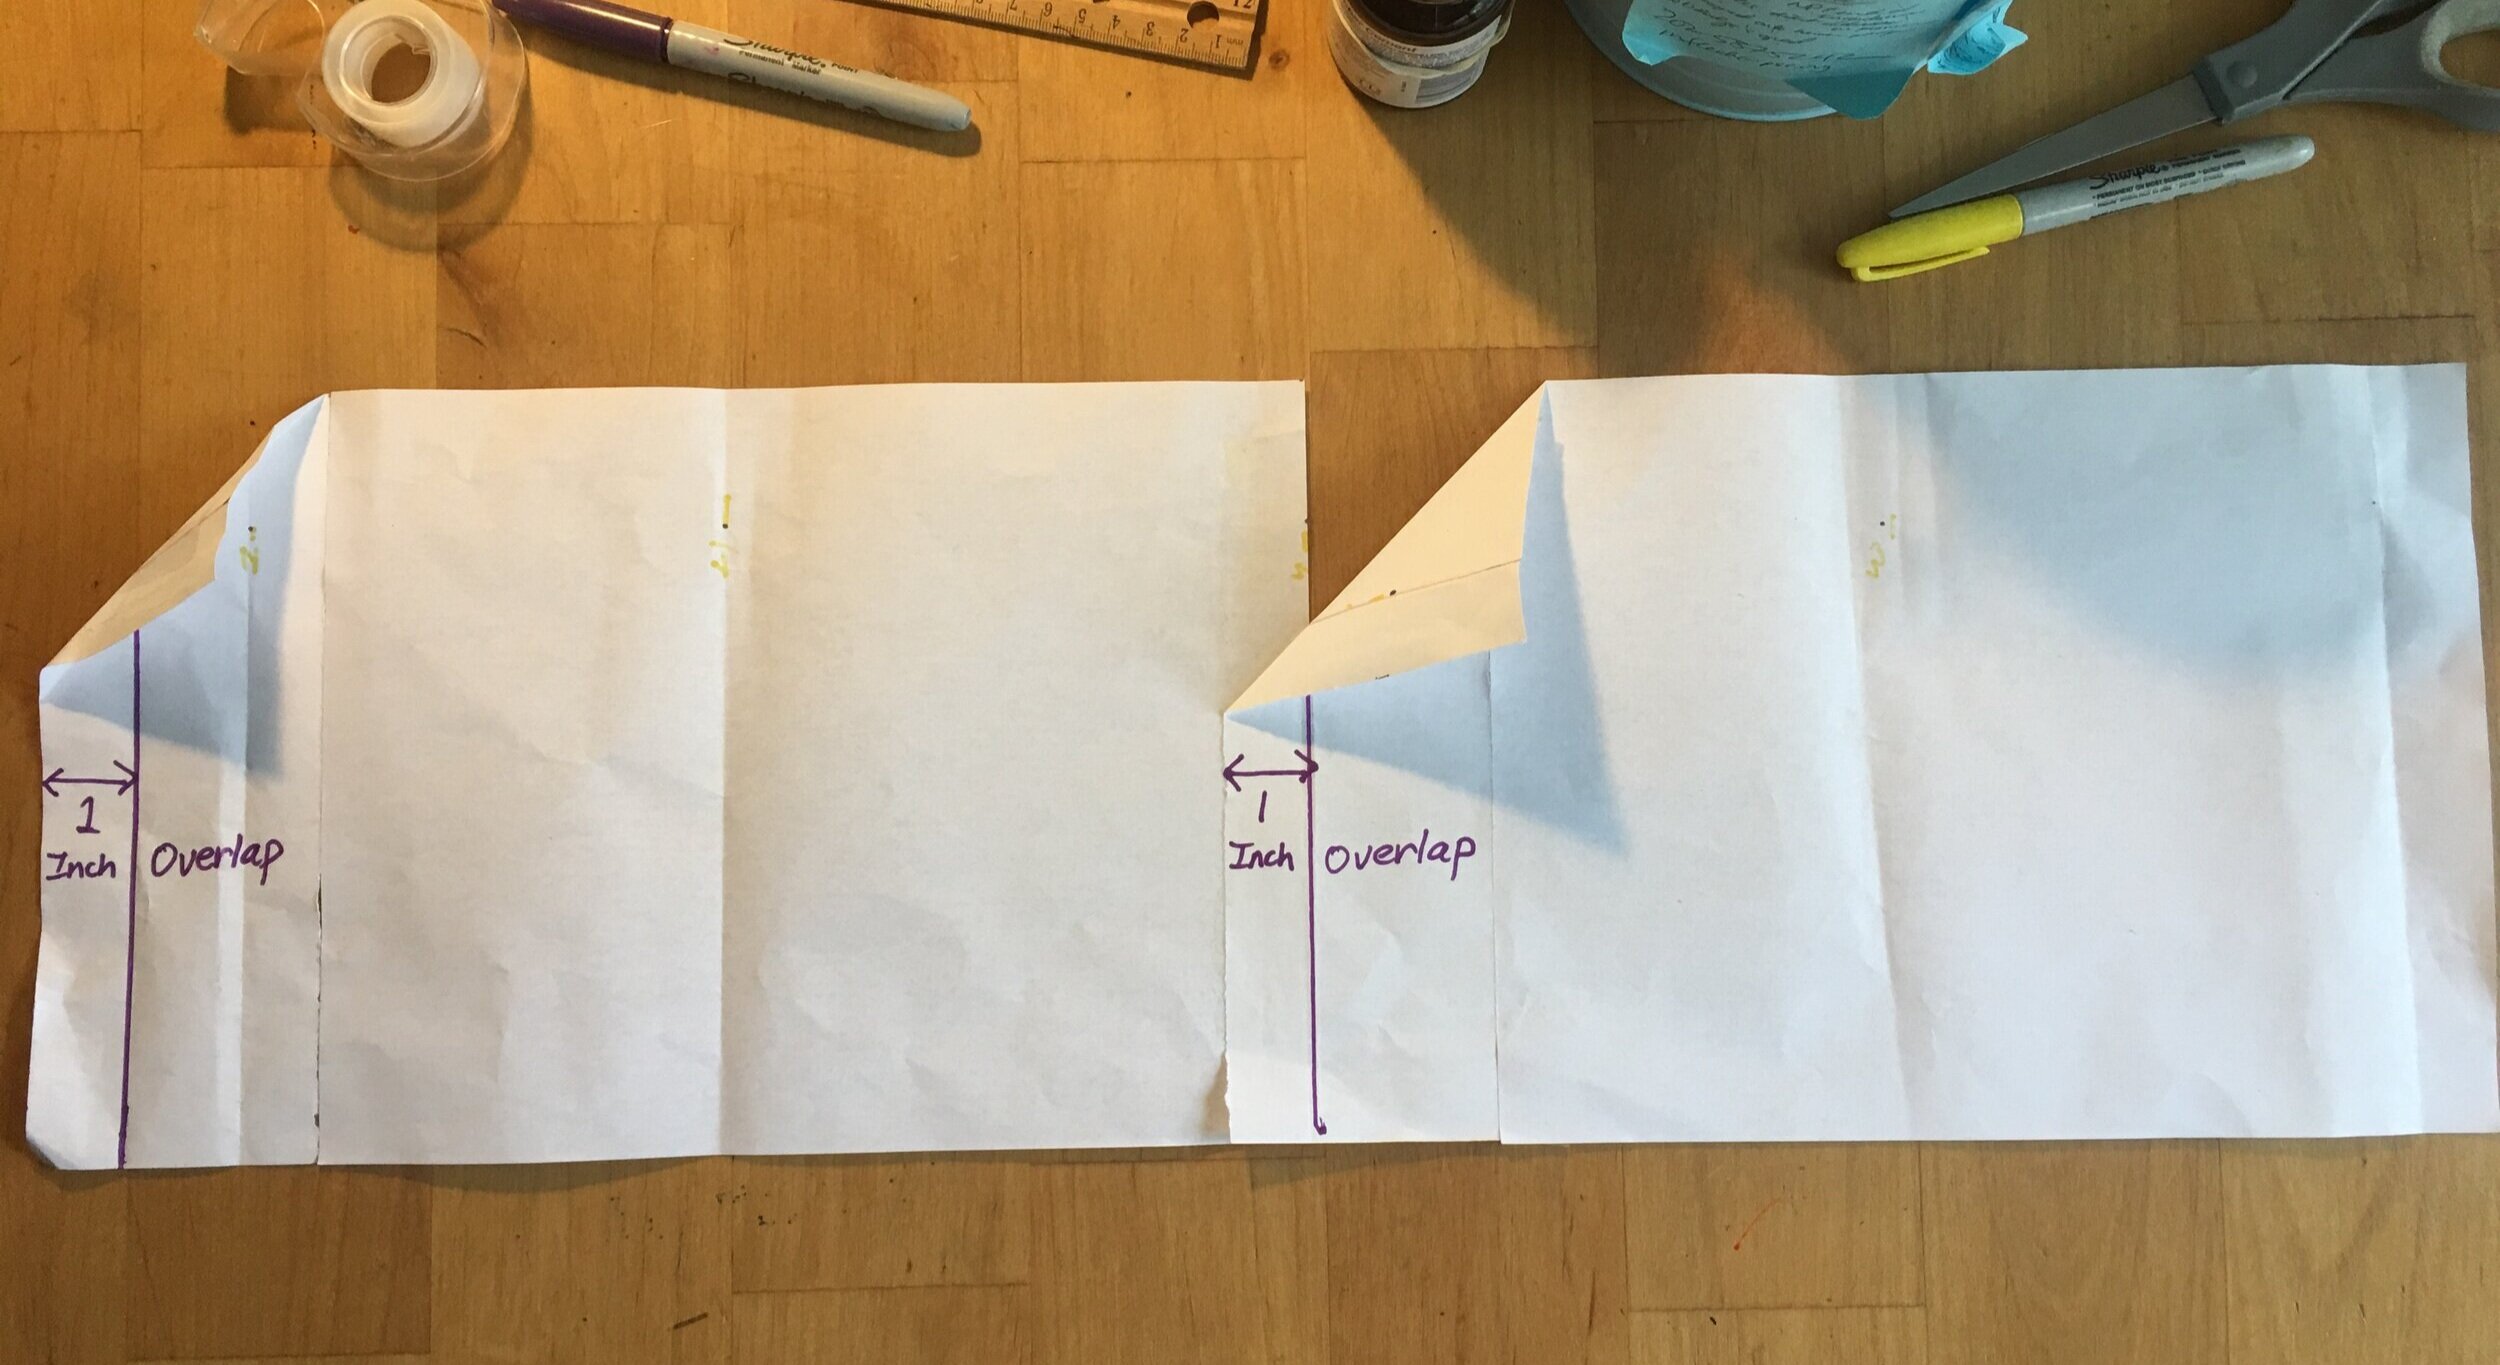
2. Mark off four 6 1/2 inch segments. The 6 1/2 inch segments are the each side of the cube for the lantern when it stands up (see next image for visualization). Fold the paper on each 6 1/2 inch mark.
3. After folding on 6.5 inch segment marks and you have a completed lantern to decorate.
